Introduction
Transforming your outdoor space with a paver patio not only adds charm but also provides a functional and inviting area for relaxation. In this DIY guide, we’ll explore the step-by-step process of installing a paver patio, allowing you to create a beautiful outdoor oasis with your own hands.
Planning Your Paver Patio
Before diving into the project, a well-thought-out plan is crucial. Consider the size, shape, and location of your paver patio. This initial planning stage sets the foundation for a successful and aesthetically pleasing result.
Gathering Materials and Tools
To embark on your DIY paver patio project, gather the necessary materials and tools. This includes pavers, gravel, sand, a shovel, a level, and a tamper. Ensuring you have all the required items beforehand streamlines the construction process.
Preparing the Area
Proper preparation is key to a durable and long-lasting paver patio. Mark the area, excavate the soil, and level the ground. Creating a solid and level base is fundamental to the stability and longevity of your patio.
Choosing the Right Pavers
Pavers come in various types, colors, and textures. Consider the overall design of your outdoor space when choosing pavers. Whether you prefer a classic or contemporary look, select pavers that align with your aesthetic vision.
Laying the Foundation
With the area prepared, add a layer of gravel followed by a layer of sand. Proper compaction is crucial to ensure a stable foundation for your paver patio. Take your time to achieve the desired level and firmness.
Arranging the Pavers
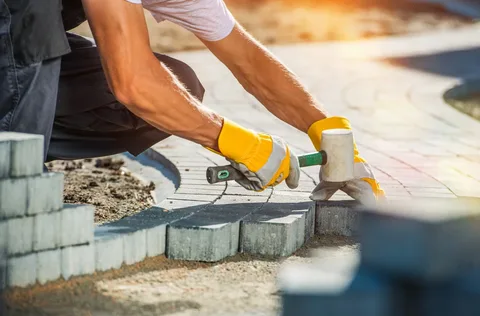
Lay the pavers according to your chosen pattern. Pay attention to spacing and ensure a snug fit. A well-arranged pattern not only enhances the visual appeal but also contributes to the patio’s structural integrity.
Cutting Pavers to Fit
Edges and corners often require cut pavers for a polished finish. Utilize a saw or chisel to achieve precise cuts, ensuring a seamless integration of pavers along the patio’s perimeter.
Edging and Restraints
To maintain the shape and stability of your paver patio, consider using edging. Options like plastic or metal edging provide a clean and defined border, enhancing the overall appearance of your patio.
Securing the Pavers
Once the pavers are arranged, secure them by sweeping sand into the joints. This additional step helps lock the pavers in place, creating a solid surface for your patio.
Finishing Touches
Add the finishing touches to your paver patio. Consider applying a sealant to enhance durability and protect against the elements. Landscaping around the patio further contributes to the overall appeal.
DIY Maintenance Tips
To keep your DIY paver patio in top condition, implement simple maintenance practices. Regular cleaning, occasional re-sanding, and timely sealing ensure the longevity of your outdoor space.
Advantages of DIY Paver Patio
Embarking on a DIY paver patio project offers more than just a beautiful outdoor space. It provides a sense of accomplishment, cost savings, and the ability to tailor the patio to your preferences. The DIY approach allows for customization and personalization.
Common Mistakes to Avoid
While installing a paver patio, be aware of common mistakes such as inadequate base preparation or improper paver arrangement. Learning from these pitfalls ensures a smoother and more successful DIY experience.
Safety Considerations
Prioritize safety throughout the DIY process. Wear appropriate safety gear, use tools responsibly, and take necessary precautions. A safe approach guarantees a satisfying and injury-free project.
Conclusion
Congratulations on completing your DIY paver patio project! By following this step-by-step guide, you’ve not only added value to your outdoor space but also created a personalized haven for relaxation and entertainment. Enjoy the fruits of your labor and bask in the beauty of your newly installed paver patio.


